


Skirting boards are commonly known as baseboards. These boards run around the lowest part of an interior wall. They are used for decorative purposes. Skirting boards feature moldings and complex carpentry. On the other hand, they are to be a plank of timber or wood that has been fixed to the wall.
The added functional purpose of skirting boards is to work as a protection for the wall from abrasion. It prevents accidental knocks from furniture, wear and tear, and so on. They are used to hide an unsightly wall or floor corners which may be bumpy and untidy.
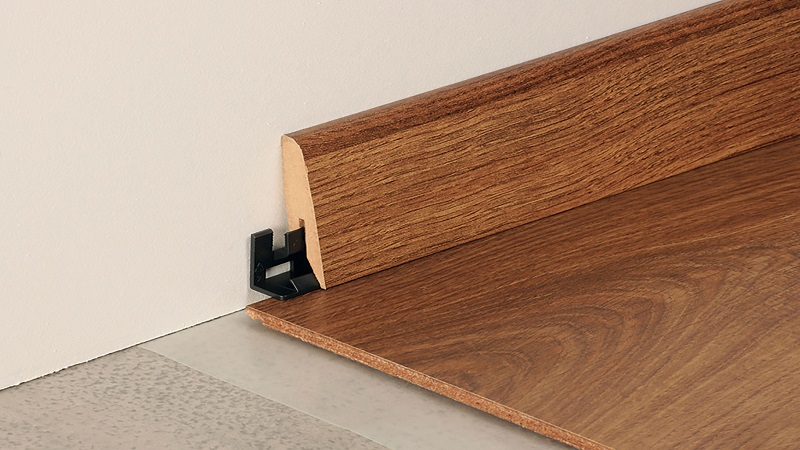
Here are tips on how you can go with a wooden skirt.
Wooden skirting
It imparts an element of richness and sophistication when it is designed along with marble or tiled floors. It works with light-colored floors and ceilings. Installing a decorative wooden molding like skirting will add a detailed look to the home. Hence, this type of skirting works finest with an ornamental or traditional looking decor.
For small spaces, apart from contrast colors, just match the color of the skirting with the wall. This will give a flawless look and an enhanced space.
What are the different wood types?
- Softwood
- Hardwood
- Pine (Redwood)
- American Oak
- Tulipwood
- Sapele
Removing old skirting board
Run a sharp knife along the top of the skirting board to cut any paint or wallpaper sealing the join. For more finest fixing adhesives like plaster and wood filler use a hammer and chisel.
Starting at the top of the door frame, place the blade of the chisel into the join connecting the wall and the top of the skirting then tap the chisel with a hammer.
Lever the board away from the wall. Keep in mind that where boards meet in a corner, one board will be nailed over the other.
When a gap has opened up among the skirting and the wall, slot a wooden wedge into the opening to preserve the plastered wall.
Insert a crowbar between the board and the strip of wood the prise the skirting away from the wall. You may find a particularly stubborn part of the skirting board which may have been fixed with screws. This is typically difficult to detect on the front of the skirting board since the heads will be covered with filler.
Try to remove any screw fixing. If this is impossible then you will need to cut it with a cold chisel or a hacksaw blade.
Proceed alongside the length of skirting and pushing in wedges of wood behind the loosened skirting. After this, it will come out of the wall.
Cutting skirting boards
Before setting up new skirting board, arrange the boards which will meet at the corners of the room.
For internal and external corners, the ends should have a mitered link of 45º to create a clear joint. You can use a miter block to build this cut: however, a power saw with an adjustable blade will provide an accurate cut. Although the angle of cut is 45º for both an external and internal corner, the direction of the cut varies.
If you are fixing skirting boards on the wall of the hallway, you might need to make a joint prior to reaching a corner. This is supposed to be done using a scarf joint cut at an angle of 45º. The two ends creating the scarf joint should be glued simultaneously and protected using angle pins.
Installing Skirting Boards
Fit the skirting boards or moldings working on their own method around the room. You have to make sure you leave the nails uncovered to allow for any repositioning.
Avoid nailing of 2 to 3 inches of each piece to avoid breaking. It is better to pre-drill, especially if you’re using fixing screws.
Where necessary, nail the skirting board or architrave in the curved, or cove part of the molding. It’s better to hide the fixing holes, nails or screw molding into wood studs or screw plug holes.
When nailing ensure all nails are countersunk to craft, filling easier. If screws are used, finish the hole with tapered wood pellets for a natural finish or filler if pellets are unavailable.
